This year, on October 23, we celebrated our 8th wedding anniversary! Wow! 8 years is a long time. I wasn’t even in college that long and it took me FOREVER to graduate! We have had some pretty fabulous years so I wanted to do something special for Scott.
Scott is usually a really great gift giver. He always comes up with something great that I just mentioned in passing, or he thinks up something that I really need/want that I never even thought about. I, on the other hand, am not. I am very indecisive and look too closely at the price tag. If I talk myself into getting something for someone, I usually end up talking myself out of it for fear of them not really liking it or needing whatever it is. I have gotten much better in recent years, but I’m still not close to being an equal with Scott. For example, the first gift I ever bought Scott was a cheap game I had never played and some playing cards. I guess I thought he would like it, but I didn’t put much thought into it. He tried not to show it, but he was disappointed. After all, he had just given me an expensive diamond ring and had offered to spend the rest of his life with me. What was I thinking?? Then there was a couple of years ago where I ran to our local hallmark store, the day of, and bought him a picture frame….it still does not have a picture in it.
This year, I had some great ideas, but I also knew I was a little short on money and he would not want me to spend much, if anything on him. However, I really wanted to give him something special so I consulted Pinterest, of course! What would be better than something mushy and made from the heart?
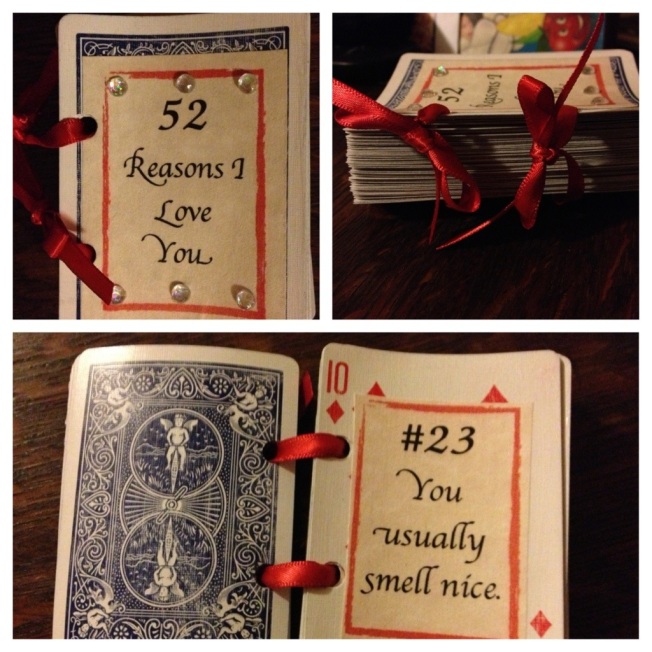
This is what I came up with: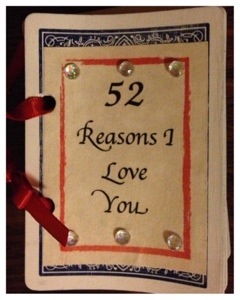 A deck of cards (Anyone else see the irony?), made into a book, each page being a reason I love Scott. How awesome is this idea? It can even be revamped for different things. How about an awesome quote book of your kids quotes on their favorite card game? What about a teacher gift, “Things I Learned In School This Year.” Or something special for parents or grandparents, “52 Things You’ve Taught Me About _____” fill in the blank with life, marriage, God, etc. . .
I really LOVE this simple, meaningful gift. Now, the part you’ve all been waiting for… This craft really is simple. All you need is a deck of cards (new or old), a hole punch, ribbon (or ring clasps), sandpaper, printer (unless you have nice writing), Mod Podge, and any small embellishments.
Let’s do the hard part first….making your “list.” Just joking, this parts not hard! There are even some “generic” lists online you can find if you are having trouble. I wanted to use stuff like this: 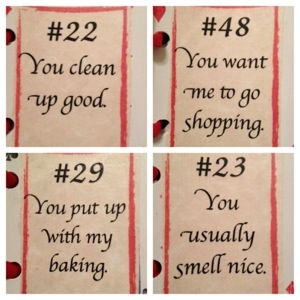
You need to measure your deck of cards and figure out what size of paper you want to put on them. Some people cover the whole card, I wanted to show the card. Once I found my measurements, I made a template on the computer and copied and pasted. If you have a program like MSExcell, just make each box the size you need, leave some space in between and add a cute border. I didn’t have that luxury but it was easy enough. I only wish I could change a couple of things. I wish my boxes were a bit smaller to show a little more of the card, and I wish I had some white paper. Originally, I was going to stain my cards, but they kept warping. 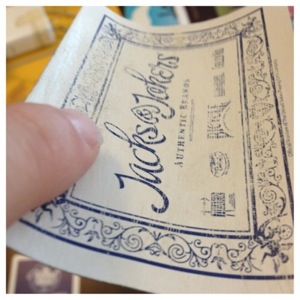
I had to abandon that idea so in the end, my paper didn’t match the color of my cards and the red ink wasn’t as red as I wanted. I still think it turned out nice.
The next part is fun, and super messy… SANDING! Definitely put some paper down under your deck of cards because it will leave a MESS! For our honeymoon, we took a trip to Vegas. It’s a fun place to go and you can stay at some really nice hotels fairly reasonably. We saw some shows, rode horses in the desert, saw the sites, and ate at some awesome places! We also brought back a BUNCH of card decks for souvenirs and gifts for family/friends. I REALLY, REALLY wanted to make this gift out of a deck of cards from our honeymoon hotel, but I could only find one deck from there. I decided it would not be a good sentimental idea to destroy this deck of cards in my experiment if something went wrong. So instead, I purchased a brand new deck of cards with the most interesting back I could find. Then I lightly sanded to roughen up the cards, give them a little character, and to remove most of the plastic coating so they would glue nicely. I’m not sure how well the mod podge will adhere if you leave on the plastic coating. I didn’t want to risk it, so I sanded…and sanded…and sanded the front and back of 52 cards and 2 jokers. 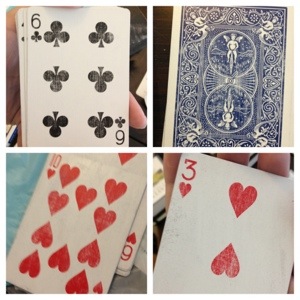
After dusting the cards off, use a very thin layer of mod podge and glue the reasons to the front of each card, making sure you center it so there is room to punch holes on the left side. Mod podge the “Title” to the BACK of a Joker card.
After this dries, give the paper side of your cards 2 thin coats of mod podge. Originally, I only gave one coat, and then decided to add the second. It really made a big difference. It also made my deck of cards really thick. 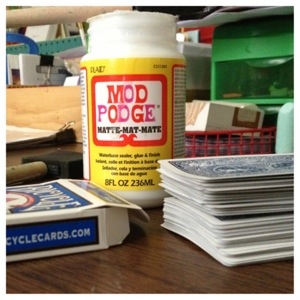
When they dry, start punching holes. I made a “template” with my cover and kept using it to make sure everything was lined up correctly. 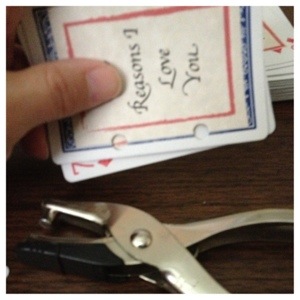 Then, stack the cards up, put some ribbon through the holes, and wrap that gift up!